Surviving winter
- justinsbusybees
- Feb 20
- 5 min read

Updated: Sep 24
My name is Justin, and I’m a beekeeper here in Estonia!
I want to share with you what it’s like looking after bees in a cold climate country, maybe it’s your first winter as a beekeeper and need some advice, or maybe some reassurance that you’re doing everything you can already for a winter success.
It gets very cold here during the winter time, we can expect temperatures as low as -24C usually with plenty of snow!
Our winters have been known to last from late September through to late April, so there is a lot of preparation needed to keep our bees well fed, warm and healthy to give them the best chance of survival during this period.

What I do after any heavy snow fall is take a walk up to the beehives and give them a bit of a clearing.
Now when I say clearing, I don’t move any of the snow from the roof. The snow on top is a good way to help with insulation (I will talk more about how I’ve insulated the beehives later).
I do however move the snow away from the bottom entrance.
As you can hopefully see in the picture, I am using an entrance reducer; it’s also a good mouse guard for this time of year.

There are 2 reasons why I clear the entrances. Firstly it provides some air flow and ventilation from the bottom of the hive.
I use solid bottom boards year round if you were wondering.
Secondly it provides space for the caretaker bees to move any dead bees out of the hive.
If you see you have a pile of dead bees at the entrance to your hive at this time of year, don’t panic! See it as a good sign, it means that there are bees inside that are alive and capable of moving the dead bees to the outside.
Give them a helping hand and clear any of them away that you see.
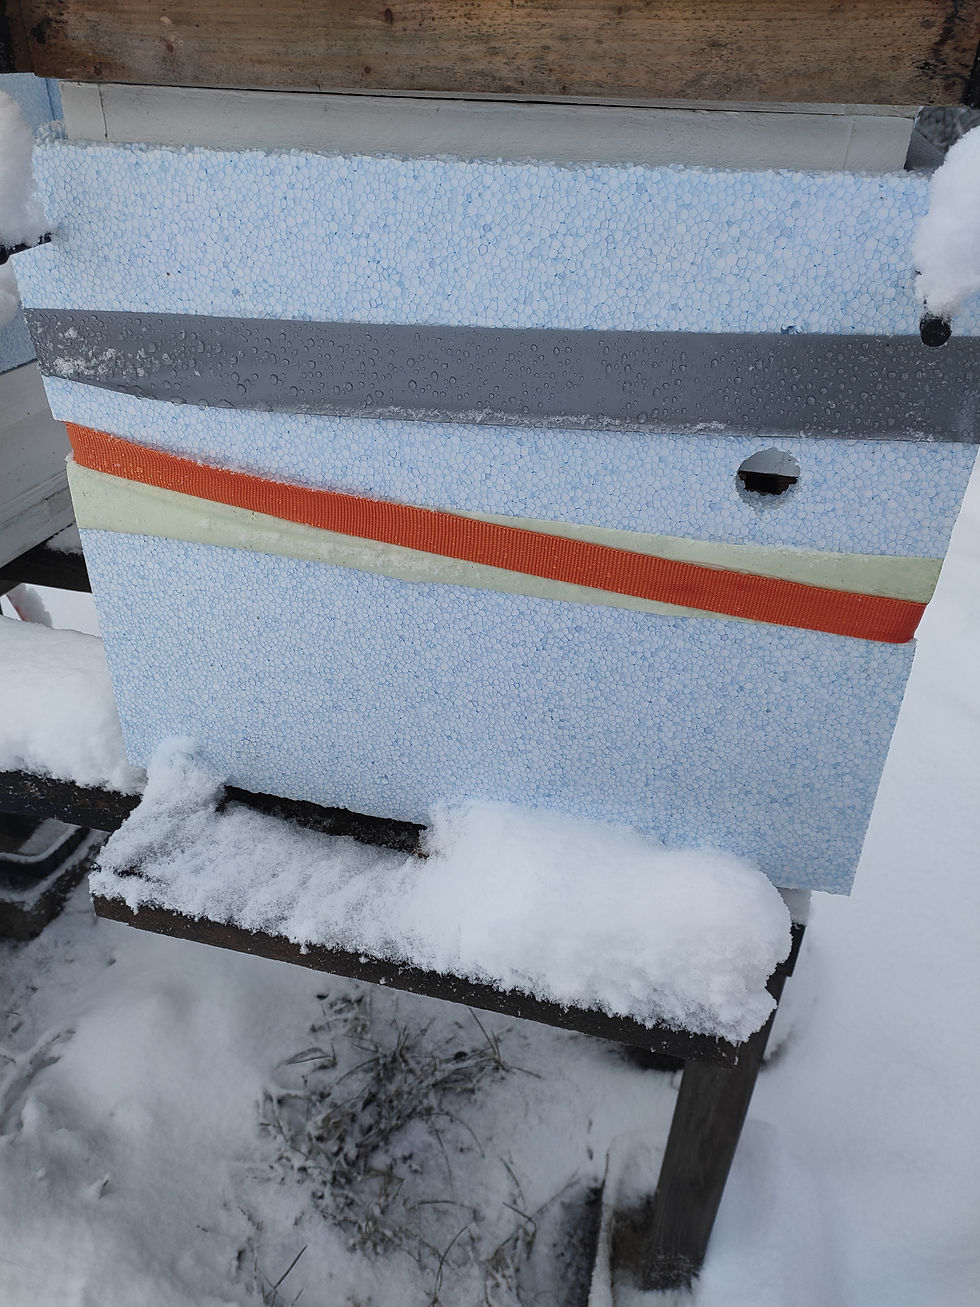
You will notice from the pictures that I have insulation around my beehives. Admittedly I need to do a better job of this next year and put some sheets together cut to size and stuck together with duct tape properly.
This year I just cut some pieces of 2cm thick insulation board for the front, back and sides. Then I used a ratchet strap to hold it all on (with a little bit of duct tape in places, yes I know it looks a little messy!).
And yes you are right to notice that I also have a small opening at the top of the hive. The opening is created by turning my crown board so the hole faces downwards.
This gives the bees an exit hole from the main box so they can do cleansing flights when the temperatures allow, and also provides a little more ventilation.
The crown board opening is about 2cm wide by 1cm tall.
Why is ventilation so important? It’s not the cold that kills the bees; it’s the moisture that turns cold that kills them.
Inside the beehive all of the bees will be clustered together in a ball, they vibrate gently creating heat to keep the entire colony warm.
This is going to generate some moisture – condensation. You don’t want this dripping back down onto the bees from the top of the beehive.
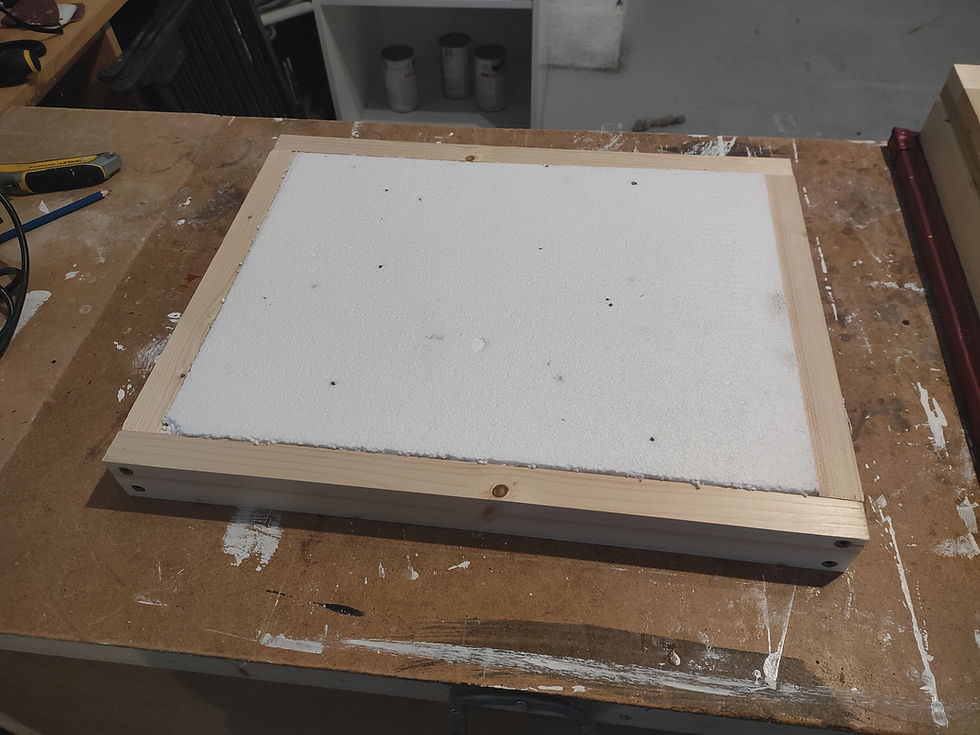
So you need to keep the top of the hive more insulated than the sides. This will help the condensation gather on the sides (on the inside of the hive) and run down to the floor, rather than form at the top and drip onto the cluster of bees.
For this I use a 5cm thick piece of insulation board built into a wooden frame, this then sits at the top of the hive beneath the roof.
Below the insulation board is the medium box (with frames removed of course!) which houses the feeder. I use what’s known as a rapid feeder, filled with dry sugar.
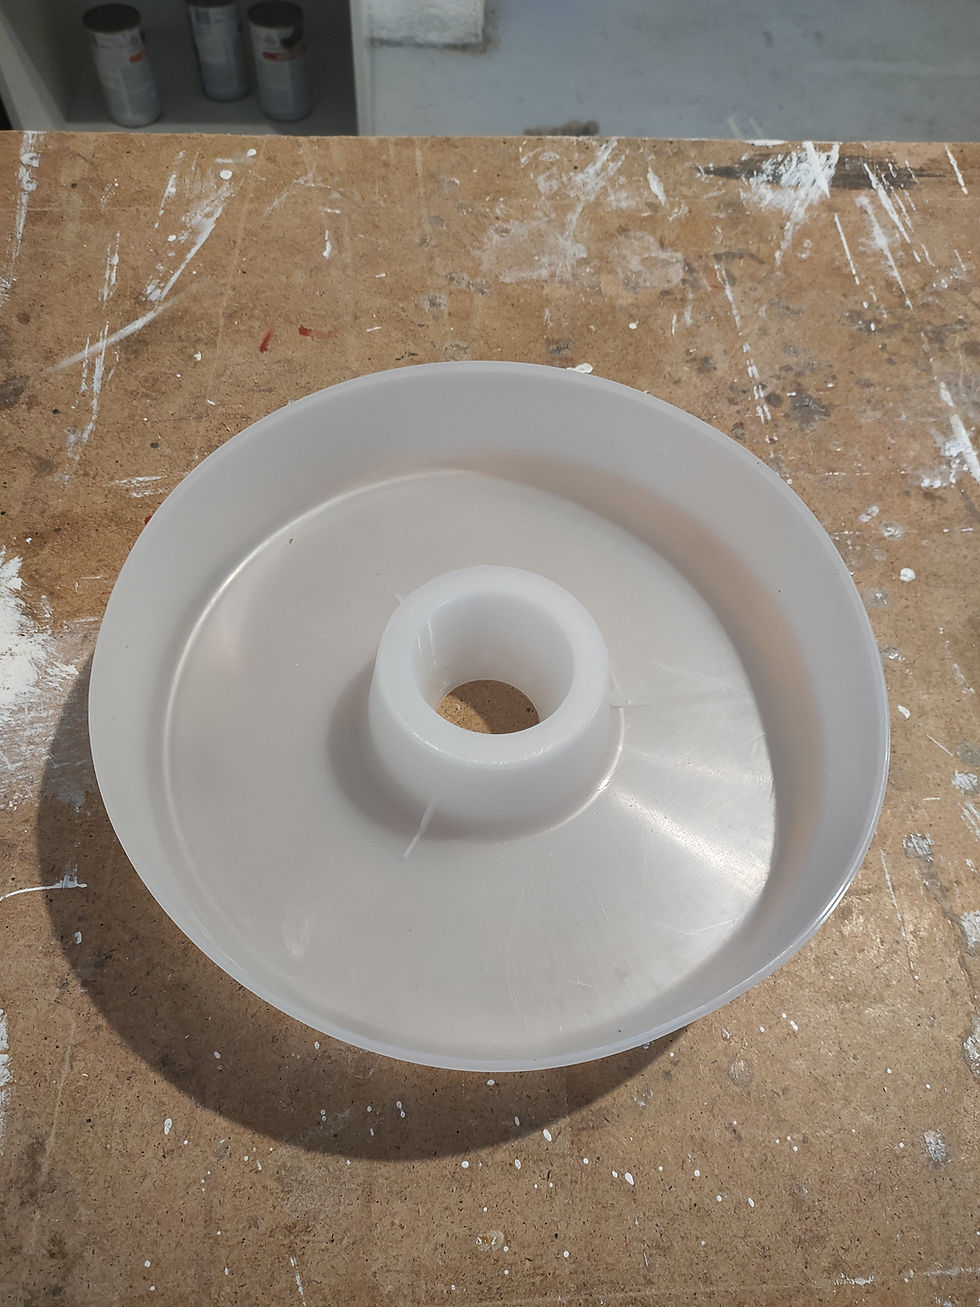
I put the sugar in once the bees stop taking the 2:1 thick sugar syrup and leave it through the winter. I check every couple of weeks to see if it needs topping up. It needs to last them through to spring when it’s warm enough for the bees to start taking sugar syrup again.
I use these style feeders as they can be used in the spring for liquid syrup feeding (comes with a lid and a cup that goes over the hole) as well as winter for dry sugar. This one in particular is a 2 litre version.
Winter preparation starts in August!
I take any surplus honey to be harvested from the supers no later than the first 2 weeks in August.
This is also the time when I reduce the hive down to a single brood box. All of the bees from the honey supers get shaken down into the main brood box. My thinking is that if I have more bees being able to cluster up going into winter, the better chances of survival.
Egg laying from the queen is coming to a close, and the brood still needs to be kept warm for those winter bees to emerge in a month or so.
So after the harvest has been done and the hive reduced to a single brood box, it’s time to treat for varoa.
I use the 65% formic acid that can be bought in bottles. My method for this is to place some cotton pads into a zip lock bag and add 30ml of formic acid.

I then perforate the bag to allow the vapours to release.
I place one bag on top of the frames in the centre where the brood is.
I then leave this on for 5 days and then repeat, leaving it on for a further 5 days.
Once all treatment has been completed it’s time to start feeding. It should still be warm enough to feed 1:1 sugar syrup for a few weeks, going into early September.
From mid September depending on temperature I switch to feeding 2:1 sugar syrup, this should be done throughout October. This is because the bees are not able to remove the water content as easily, and when the temperatures drop to under 10C constantly, I will put the dry sugar on.
After this it’s a case of checking the hives after every snowfall to keep the entrances clear, checking every few weeks there is enough sugar for them, and keeping fingers crossed they all make it through to the next spring and another harvest!


Comments